The Virginian Railway built some unusual freight cars, and this pulpwood car is a good example. On a 40' flatcar, the shops added some bent-up rail to form racks for the logs. A center rail provided a stop, and the outer rails were raised on lengths of old ties, to tilt the sideways-stacked logs inward. (Virginian also built a 50' version of this car with the outer rails mounted on ties set lengthwise instead of crosswise.)
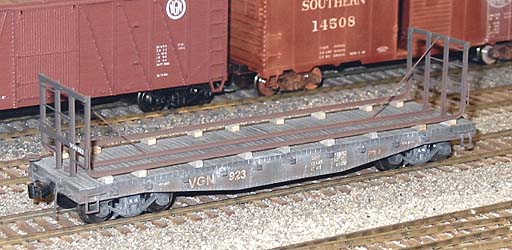
I started with a Red Caboose 42' flatcar, and sawed a two-foot section out of the center. Code 55 rail was bent using a metal rod with a groove cut into it to get a smooth curve. Various pieces of brass flat stock and wire were soldered to the rails to create the log rack, which is completely separate from the car. A couple of drops of ACC adhesive holds the rack to the flatcar deck.
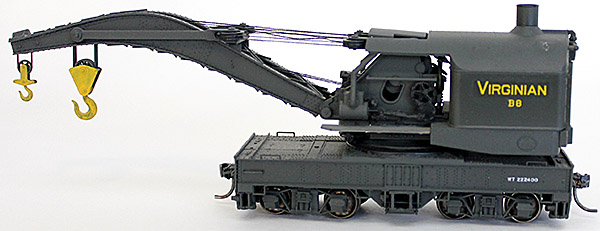
This Industrial Brownhoist 120-ton wrecking crane was built from a Tichy #4010 styrene kit. I don't remember if the Virginian lettering came from a commercial decal set, from custom decals I had made, or from decals I printed on an inkjet printer. This model deserves a full weathering job, a future project.
This began with an Eastern Car Works depressed-center flatcar kit, which was relatively easy to build.
I installed prototypical 28-inch wheels, which lower the car and dramatically improve its appearance on the track. The lowered frame requires a Kadee coupler with the knuckle offset upward.
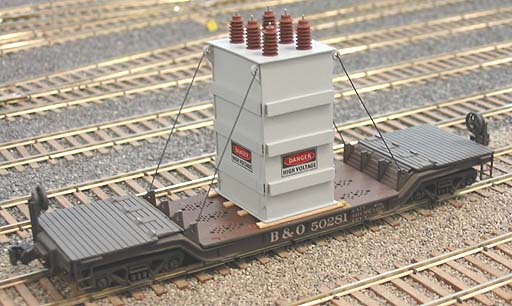
The transformer is scratchbuilt from styrene, modeled from a photo of a prototype flatcar of this style carrying a similar load. The transformer is easily removeable so I can run the car empty if I choose. The ends of the tie-down rods are bent at a right angle; they are cemented to the tranformer, and slip into holes in the flatcar tie-down brackets.
I made the Danger - High Voltage decals with Adobe Illustrator on my personal computer, then printed them with a color inkjet printer on decal paper from McGonigal Paper & Graphics.
No, that's not white ink for the word DANGER and the background of the HIGH VOLTAGE area - the decal is transparent and the light gray paint shows through. At a casual glance, without close inspection, the impression is that it is white.
I detailed the flatcar deck to represent remnants of angle-iron that was welded-on as blocking for previous loads. These were modeled by applying liquid styrene cement to the end of a styrene U-channel, then pressing it against the deck. Before the cement dried, I removed the U-channel, leaving a rough area where the styrene dissolved. I painted these remnants a reddish brown to represent rust.
These photos are of a imilar car and load, plus the rusty mounting bracket remnants, found in 1998 at the Virginia Transportation Museum in Roanoke, Virginia.
|
|
|
As-built, the model was too light, so I added lead – mostly bird shot from a gun shop – to every available cavity in the frame, and cemented in place with artist's matte medium. This brought the weight up to about 80% of the NMRA recommended standard for cars of this length. There was still some space after adding the bird shot to the cavities in the depressed center, but not enough for another layer, so I added snips of thin flat lead. This photo shows the bird shot and the lead snips. Note the two small lead pieces glued to the truck frame for still more weight – every little bit helps.
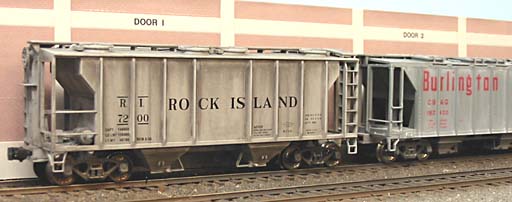
My focus in past years has been on building the layout and getting it ready for operation. Consequently, there's virtually no scenery and few weathered cars. Recently I've begun to remedy this.
Occasionally if I'm wandering around the railroad in a spare moment, I'll grab a couple cars from the yard or an industry, and weather them. Since I don't want to mix paint or fire up the air compressor, I use dry pigments and chalk (sometimes I dry-brush paint some rust spots first). I smear the chalk on with my fingers and spread it with a stiff brush. When the car looks weathered enough, I put it back on the layout (no, I don't spray Dull Cote over the weathering).